Sunday, February 21, 2010

Build Day 2/20

Saturday was another minor build day and Greg and I got a little further on the car, although it looks worse with a lot more pieces removed.

Shiny new radiator is now installed. I bought a new accessory belt, but got the woring size. This should be running again shortly!

Cold air intake. I opened up the intake box and with no headlight here, this should feed lots of cold air into the engine. This must be good for +50hp!

Cold air intake close up.

Intake as it orignally appeared with a large resonator.

Intake tube with resonator hole plugged. This should add +20hp, right?

Dash is out.

In case you couldn't see it in the last photo. this is the dash wire harness mess.

We decided to take the doors off to aid with the cage building and stripping them out.

The dash is out, drivers side.

Greg lounging in the back seat.

More work on the bender kills a chopsaw

So this week's episode began Monday with the material order not showing up. Jeremy pulled some strings to get us an awesome deal on the material, but we ended up having to pick it up ourselves. So Soren and I rented a 20ft snowmobile trailer and drove to Eagan to get the material. It didn't look as impressive as I thought it would, but 22ft lengths of 1.75" tubing is pretty heavy. Not to mention 12ft lengths of 1", 1.5" and 2" OD bar stock. Let the good times roll!


Also showing up on Wednesday was the die set! Thank you UPS!

Then Thursday night, Caz and Matt finished up milling the big parts and turning down the bushings. Hopefully the lead content in the 12L14 steel gives our shafts some nice lubrication. GD that sounds dirty. Sorry.

Next up, Discount Steel finally finished putting together my order. And they STILL didn't get it right. But whatever, I got what I needed, including a 28"x48"x3/8" plate to make a welding table. Luckily the manwagon has a spacious storage compartment.

Here's el Jeffe putting the wheels on the table. Almost time to stand 'er up and check it out. Note, the camera is in focus, there's just that much haze and weld smoke in the air.

And here's what we got done on Saturday. A rolling, flat, table of awesomeness. All set and ready to begin welding the important stuff on Sunday.

Well we thought it was done, turns out we had a few more finishing touches to put on. Here Jeff's welding on the last of our hooks for holding all our welding tools, hammers, squares, brushes, etc.

And here's the final resting place for the Harbor Freight chopsaw. You lived a good life, but couldn't quite handle all the 2"x2"x1/4" box steel I was making you cut. You'll be remembered, but of course replaced with something awesomer that'll be tax deductibe.

Now for some final shots. Had to air out the garage a bit to get some clear shots, but here are some views of the welding table and the beginning parts of the bender. As soon as the new saw arrives, I'll make a couple 45 degree cuts and we'll be finishing up the bender in the no time. Hopefully by this time next week we'll have our first bent material!


Sunday, February 14, 2010

Budget suspension mods

After talking to a guy who tracks a SC300 turbo, he suggested that the stock spring rates on the SC series is sprung a little too soft for track use. So I started thinking about possible ways to respring the car and possibly lower it. This is the first step in that process.

First, the SC400 shares the same suspension design as the MkIV Supra. It has upper and lower control arms and shocks, not Macpherson Struts like most other modern cars. The front and rear springs are both 5" diameter, although the front springs taper to fit into the upper control arm. The rears appear to be straight.

I managed to find a pair of used front shocks and springs on eBay for $10 which I bought to experiment with, and then bought a bunch of used circle track springs also on eBay for $7 to $12 each. Turns out 5" diameter is a common size.

Stock front springs, 368 lbs per inch:

Stock rear springs, 154 lbs per inch:

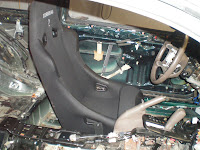
Front shocks with circle track springs:

Close up of the springs:

On the left is the stock spring. It's about 12.5" uncompressed. About 11" of that is at 5" diameter. In the center is the stock shock with the circle track spring. Notice it's a bit shorter, 9.5" overall. On the right is the stock spring and shock together.

The taper on the stock spring need to be there to fit into the upper control arm, and since the spring is a little short, and adapter will be needed. I've got a few ideas on how to solve this such as: a solid machined piece or a threaded piece and huge nut to create adjustable coil-overs. I'm not sure what we'll do, but I can continue experimenting on these parts off of the car.

Based on what the stock front corner weights should be (975 lbs), the stock spring should be about 9.9" compressed. The circle track spring is shorter, but this one is 650 lbs per inch, and I have some up to 1100 lbs per inch. At 650 lbs per inch, the spring will be compressed to about 8". If you add a 1.75" adapter (to fit inside the control arm), it would sit at about the same height as stock. I've also got a pair of 800 lbs per inch springs that would sit higher, so they may need to be cut to fit.

To keep this cheap, the front springs might be usable on the back as well. That would significantly increase the rear spring rate without adding too many dollars to the car. This would go from 368/154 to 650/368 or 800/368. Seems reasonable.

In the end, adjustable stiff springs will keep the car from diving too much or leaning too hard in the corners, and it should handle better. And the greatest part is that instead of used Supra springs or a used lowering kit to keep in budget, once this is done, we can swap out spring rates to tune the car even better. Too bad we need to continue to use used shocks. That's crap can racing for you!

Just in case anybody is interested in seeing the front shock assembly disassembled, here it is. On top, from left to right, is the destroyed boot, bump stop that we'll probably need to cut, and top shock mount. In the center is the front shock, and at the bottom is the front spring:

Starting the bender

No, no, not him. One of these...


From Frank at Takac's Cycles In the never ending quest for more tools, I decided to build my own tubing bender. Having looked around and seen how expensive buying one was, I luckily stumbled upon Frank's site and plans for his bender at Takacs Cycles. So I ordered up the plans, and contemplated how to drill all the required holes for the upright and swingarm. Luckily through Danielle and Soren, we befriended Caz and the crew at Caztek. And Caz offered the use of their shop to help the team. So we could use the band saw to easily cut through the 5/8" and 1/2" thick plate. Like buttah...


They even let me make make a mess on the layout table. But I did clean it up.


Here's Matt, one of the Caztek guys, on the Bridgeport drilling all the holes in the swing arm. Look at that concentration!

Here's the day's progress. Not as much as I hoped for, but not from a lack of trying. Unfortunately I ran into issues getting all the steel we needed. It started off as anger at Discount Steel for taking FOREVER (two days) to cut my steel, when it turned out to be because they were out of material. And low and behold, their archaic inventory management system that said they had enough material for my order, was wrong, and the value was "low enough" to mean they had zero. So what started off as anger for their lack of customer service and finishing my order, turned out to be the result of an old computer system. Maybe someday they'll fix that. But at least tomorrow my big order of steel through Jeremy should here, and hopefully I'll have more steel then I know what to do with...literally, I'm not sure where I'm going to store it all. Oh, back to the pic above, you can see the awesomely machined swingarms, and some other cut steel pieces. We got a lot of little stuff done, but will need another night or two this week to finish cutting all the holes. Apparently cutting 1.375" holes with a boring bar in 0.020" passes takes awhile when your biggest drill is around an 1.0". Harbor Freight was also out of stock of the hydraulic ram, but should have more on Tuesday. And my 1.75" die from Pro-Tools should be here Wednesday. Everything else from McMaster-Carr already showed up.

And this is some fun with a flamethrower! Stopped the open house at the Hack Factory with Caz as he and the crew showed off their flamethrower, pulse jet engine (not running...BOOOOOOOOO), and their t-shirt launcher. Lots of other cool stuff there as well from other people, but not as cool as a flamethrower. Step 2 for the project I believe is going to use higher pressure for a bigger flame. I think Soren and I need to build something to compete with Caz. If only we could write it off as a business project.

Sunday, February 7, 2010

More pics from the last build day

Thought I'd add a few extra pics I had from yesterday. I mean, how can't I post another picture of our awesome seat? I am a little confused with how we're supposed to connect the back bracket piece to the seat that connects to the cage... Next we'll start cutting out some of the door, and that huge side impact bar.

Here's the box of parts we pulled to shed another 10lbs.


Like Soren said, hopefully we didn't take out any we need, because as you can see below, it gets a wee bit confusing. But the engine and ABS modules are still there, so that's all we should need, right?


Here's a picture of the new belt routing that Soren mentioned. With taking out the AC compressor, and bypassing the location for the hydraulic fan pump, we'll need a shorter belt, but should still have sufficient wrap on all the needed pulley's and accessory drives. Time to mark it, measure it and head to the parts store.

Had to show this grossness also. Mixing hydraulic fluid, coolant and oil looks a bit strange. I bet it'll kill some grass in the backyard too...

And one final picture, an action shot of Soren approaching ludris speed. As you can see, he hasn't quite gone plaid yet.

Next up, the big bending weekend in about a month. Gotta finish making the bender from the plans I got from Takacs Cycles. Should get a post together on how that goes once the steel shows up. Until then...

Build Day - The seat is here

Saturday was a 'major' build day and we managed to get the almost the entire team together to see how everybody fit in the car with the new Corbeau Forza 2 seat. Despite a range of heights and weights, everybody fit fairly well. It looks like Ben will need to add some padding, but a lot less than we were imagining. The Supra bracket fit well, although the slider is a little tight. Hopefully it will loosen up with use. We'll also check all of the seat bolts to make sure it's not binding.

It does look like a Gurney bump may be required to make sure nobody's helmet rubs the ceiling. This should be pretty easy since we need to fill in the hole vacated by the sunroof. How many horsepower will this racing feature add? 20? 30?


We also put some tape up to simulate a cross style door bar. That will make getting into and out of the car a little more challenging, but a cross type door bar looks a lot better than the traditional parallel style. We also need to look at a removable steering wheel although the car has, seriously, electric tilt wheel, so when we remove the motor perhaps we can modify it to tilt up out of the way a little?


We also got the hydraulic pump for the fan taken apart so that we could reinstall the housing and put the belts back together. We need to fit a smaller accessory belt on the car, bypassing the AC and hydraulic pump that we removed, but the belt routing will work really well. The cooler for the hydraulic system will be reused, probably as an oil cooler or a bigger power steering pump. Yeah for free parts!

We also pulled another 10 lbs out the car as well with a few hopefully unneeded computers: Air bag controller, cooling fan controller, keyless entry receiver, etc. The airbag controller was about 4 lbs by itself! We're up to about 450 lbs pulled from the car.

Overall a good day. The next major project is the cage. Tubing it on order and we should be building it in about a month.

Wednesday, February 3, 2010

Seat pre-install

So apparently I'm not carrying my weight info in the blog and have called a slacker. So here's an update on the seat. It showed up during the snowstorm on Monday, thanks to a timely Up's man. I unpacked it Tuesday to get a look at it and make sure it wasn't damaged, its good to wait a day to do this, I swear. And everything looked good, just a tear in the plastic bag from the box holding the bracket.


So the bracket wasn't quite as adjustable as we were lead to believe, and by that I mean its not adjustable at all. It did look nice and had the slider already installed and a nice wrinkle powder coat finish. The first two holes near the door lined up well, and I thought the other front one did, but not so much when I got the bolts in the other two. Its just a little bit off, but nothing a little dremel action won't solve. Now the other back mount looked a little weird. It had a bracket to line up with the seat belt bolt, but it didn't quite line up. Then I noticed another bracket on the bottom, that was covered by the slider piece. Luckily this one lined right up. And yes, the tag says its for a Supra, not an SC400.


Being the lazy bastard I am, I just set the seat in to try it and didn't bother bolting it in. Gotta save something for the guys to do when they show up Saturday at noon. I must say it looks nice.


So then what's a guy to do? Yeah he has to get in, try it, and hold the steering wheel and make VRRRRRRRROOOOOOOOOM, VRRRRRRRROOOOOOOOOOOM noises and pretend he's driving. Yes, I did it, and a took a picture to prove it.

And I completely admit this layout is awful, but I'm mad at the stupid picture loading, and had to try it out. So yes, its awful, suck it up, I'll do it different next time. Until then.